This option is used to process and control Objections to assessments.
The procedure until very recently was if there was something wrong with an assessment. You had the ability to complete an ADR form and then submit that for correction and then that would go through the various processes at SARS. Now you have the ability to revise the original return if the return is done electronically. Use this routine to track and control request for objections or errors to be corrected if you detect and error.
This process can be run from the assessment transaction screen.
You have two electronic mechanisms:
1. Notice of correction - This can be requested from the eFiling module.
2. Notice of objection - This can be requested on the SARS eFiling website.
However if the assessment is wrong and the inputs are correct I then think that you still have to go through ADR objection process or online objection. The data entry routine in Sky Tax is just a mechanism so that you can keep track of what assessments needs to be changed. When the correct assessment comes through you can mark off that assessment as having been properly processed.
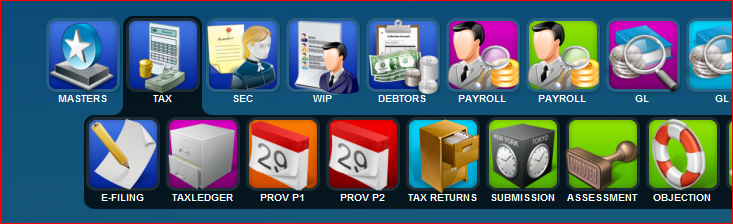
How to – Tax Objections / Queries
1. Select The menu option Objection from the Tax sub menu
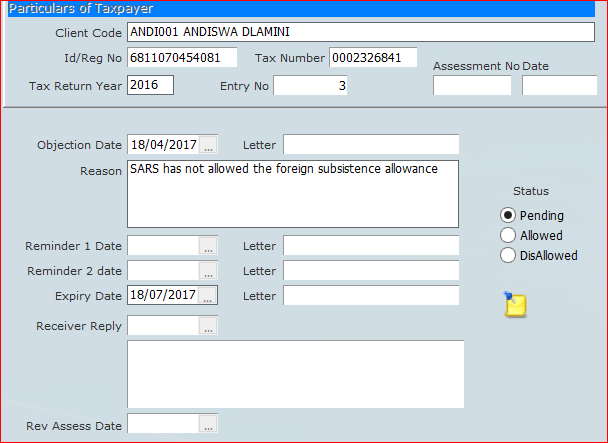
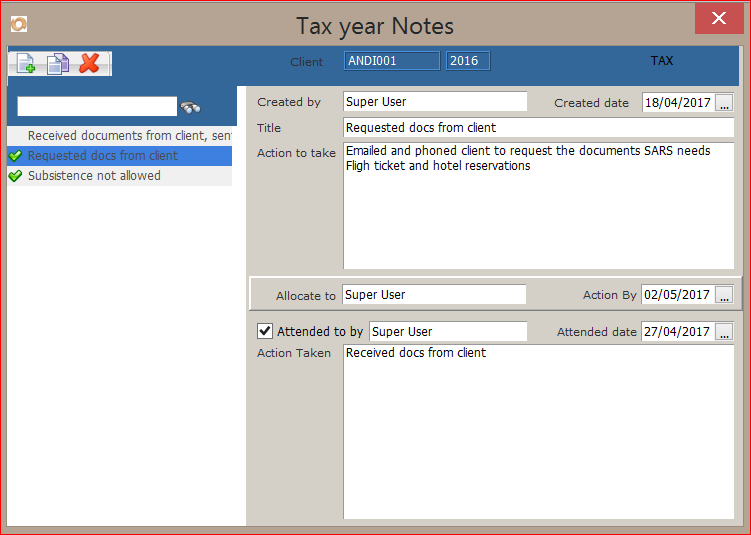
2. To create a new objection/query click on the new icon 
3. Enter the client that the objection is for,date objection lodged and the reason for the objection, also enter the expiry date as the latest date that the objection has to be resolved, normally 90 days from objection date.
4. Click on the notes icon
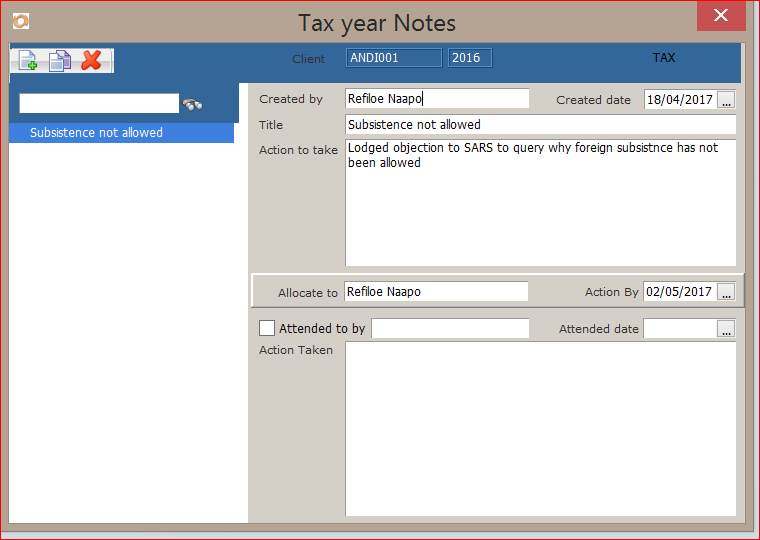
5. Click on the new icon and enter information as per example below
6. For action by date, enter a date that you would need to follow up with SARS, in the example, 14 days after objection.
7. If you require this to be followed up by someone other than yourself, change the allocate to.
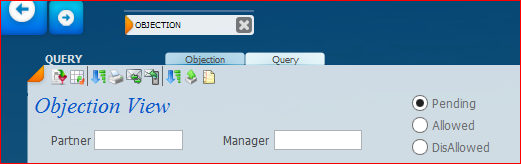
8. To view the Objections/Queries on File, select the query tab at the top
9. Select the partner ( and / or manager) if you wish to show clients only for that partner
10. Select the status type , default is for pending only queries.
11. Click on the show all icon 
12. You will now see all the queries on file as below
13. You can sort on any column , by clicking on the heading of the column
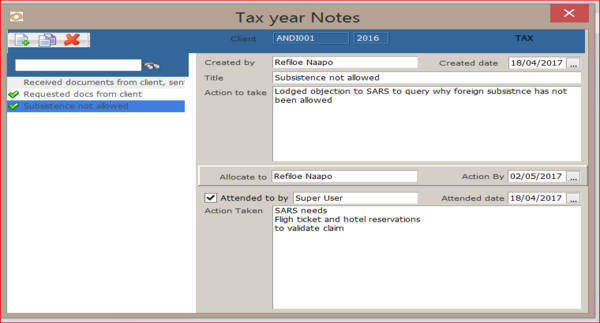
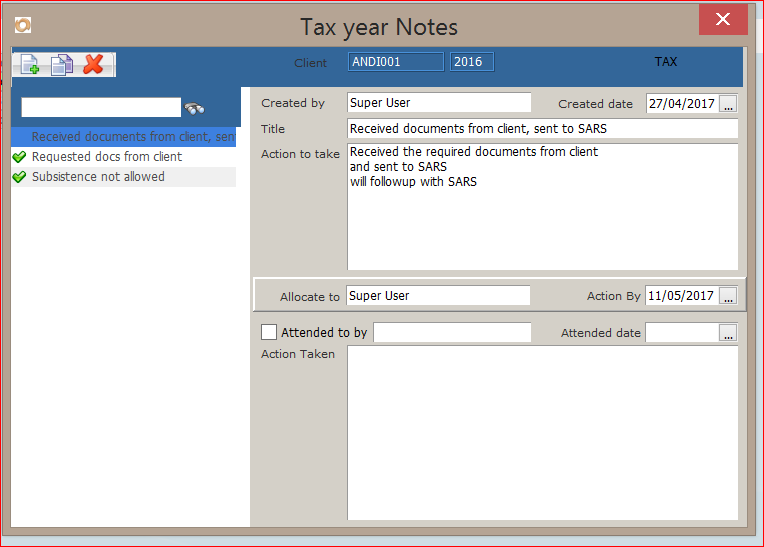
14. Where there has been a response or action on a query, click on the notes icon on the left and enter relevant information here, by tagging the current note as completed and creating new notes to detail the status and action taken/required
15. Where a query has now been allowed or disallowed
16. Click on the notes icon and enter the info here
17. Click on the Status column and change the status appropriately
10 November 2021